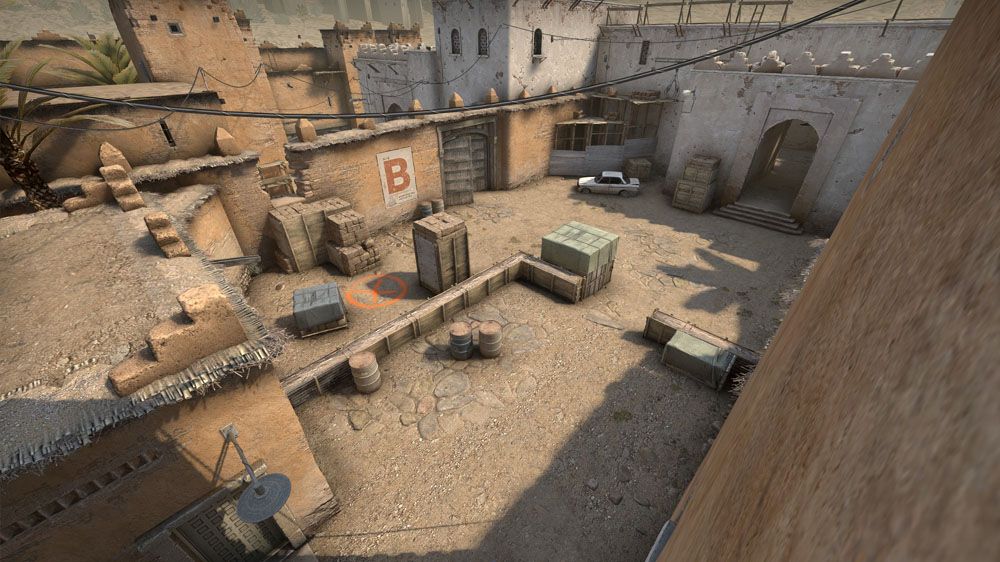
Mastering the Art of Map Control on Bombsite B
Mastering the art of map control on Bombsite B is essential for players who aim to sharpen their competitive edge in first-person shooter games. Understanding key positions, potential enemy movements, and utilizing cover effectively can create a significant advantage. Focus on establishing control through a mix of aggression and strategy. Utilizing grenades to zone out enemies, coupled with communication among teammates, will help secure dominance over this critical area of the map.
Moreover, always be aware of flanking routes to maintain map control on Bombsite B. Positioning yourself at choke points or high ground can maximize visibility and minimize surprises from opponents. To reinforce your strategy, consider practicing different tactics, such as:
- Coordinated rushes with teammates.
- Using bait tactics to lure enemies into the open.
- Rotating quickly between sites based on enemy movements.
By constantly adapting to the dynamics of the game and effectively managing your resources, you'll enhance your ability to control Bombsite B and secure victories.
Counter-Strike is a highly popular tactical first-person shooter that has captured the hearts of gamers since its inception. Players can enhance their gameplay experience by utilizing various binds to streamline commands and improve their performance. The game's competitive nature, coupled with its strategic elements, makes it a staple in the esports community.
Top 5 Strategies for Dominating CSGO Bombsite B
When it comes to mastering CSGO, dominating Bombsite B is crucial for securing victories. Here are the top 5 strategies that will enhance your gameplay and give you the edge over your opponents:
- Understand Map Control: Gain control of Bombsite B by effectively utilizing cover and positioning. Make use of smoke grenades to block sightlines and ensure safe approaches to the site.
- Effective Communication: Coordinate with your teammates through voice chat or in-game markers. Call out enemy positions and share information about bomb placements to strategize your next moves.
- Use Utility Wisely: Leverage flashbangs and Molotov cocktails to force enemies out of strong positions and cover key angles before you attempt to plant the bomb.
- Map Rotation: If Bombsite B is compromised, don’t hesitate to rotate to Bombsite A. Ensure your team is flexible, and you can quickly adapt to your opponents' strategies.
- Post-Plant Positions: After planting the bomb, hold advantageous positions. Use angles that allow you to cover multiple approaches to Bombsite B, making it difficult for the enemy to defuse.
How to Execute Perfect Smokes and Flashes at Bombsite B
Executing perfect smokes and flashes at Bombsite B requires precise timing and positioning. To begin, players should coordinate their movements and communicate effectively with teammates. One effective strategy is to use smoke grenades to cover sightlines. For instance, throw a smoke grenade from the platform near Mid to obscure the vision of enemies holding B site. This will allow your team to safely cross without being picked off. Make sure to practice your throws to ensure that they land accurately and effectively block enemy sight, granting your team better access to the site.
In addition to smokes, utilizing flashes strategically is crucial for taking control of Bombsite B. A well-timed flashbang can disorient defenders, making it easier for your team to push in. When executing a push, consider the following steps:
- Wait for your teammates to be in position.
- Throw a flashbang over the wall towards the site to blind opponents.
- Follow up immediately with an aggressive entry onto the site.
Remember, coordination is key when using smokes and flashes; ensure your team is ready to capitalize on the disruption created by these utilities.